Google has released Android 4.3 Jelly Bean with some minor feature additions and more bug fixes. Android 4.2 users wont find much difference when they upgraded to 4.3 Jelly Bean, but the responsiveness and Bluetooth smart feature to save battery when your device connected to Bluetooth devices are some important notable chances. Also for game developers and tablet users who install android 4.3 will now get better parental control options by creating and managing users profiles. Check out the top 5 android 4.3 jelly bean features in our recent article.
We have a good collection of android tutorials and you can browse them from the search box above. You may also like to read how to install android os on pc and install android ics on pc which we wrote long ago and that still works well for previous versions of android. Now here we have the latest one, which is Android 4.3 Jelly Bean for PC.
Download the android iso file and begin the process to install and run android os on your PC today.
Also Read, mSpy Review and 15% mSpy Coupon Code Discount, Best Spy App for Android and iPhone.
How to Install Android 4.3 Jelly Bean on PC
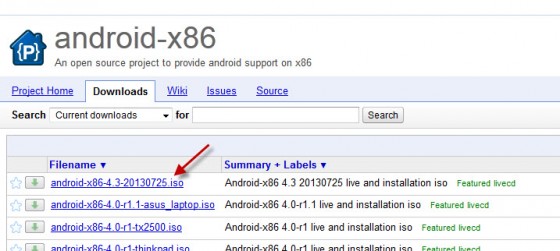
Step 1: Go To Android-x86 and you can see Android 4.3 live installation ISO file in the top of the page. Click that link to download the ISO file. Now you need a USB drive to install Android in your PC. Make sure that portable device doesn’t have any other files and it is completely formatted. The Android ISO file will come around 200 MB, so USB drive with 1 GB of memory space is enough for the installation.
Step 2: To convert your USB drive into a bootable device, you need to download UNetbootin and install it in your Computer. It is available for Mac, Windows and Linux. You can choose your operating system in the download page. If you are using Linux, you can also choose your distribution in the same page.
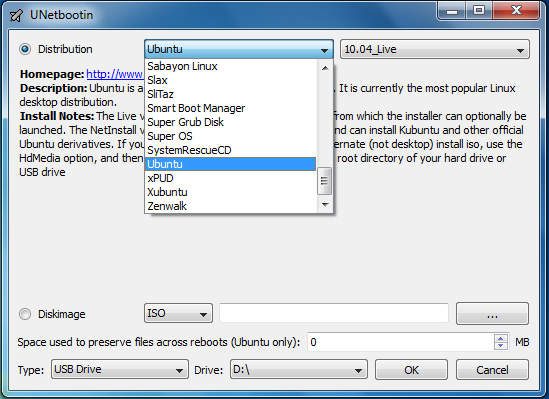
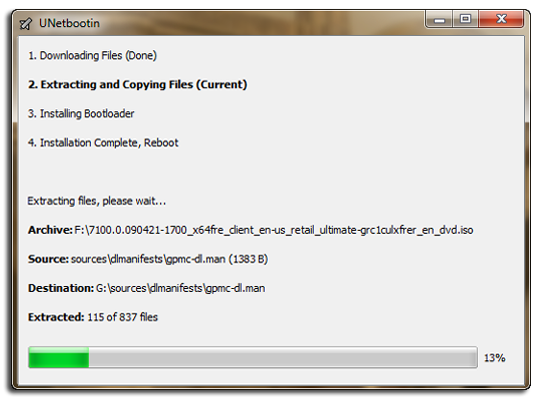
Step 3: UNetbootin is a simple application, the file size is less than 5 MB. Once you complete the installation you can see a window as shown in screenshot above. If you are Linux user, you need to select your distribution and the version of your OS. After selecting the distribution, now locate your USB drive in the bottom of the window and click “OK” to extract the file.
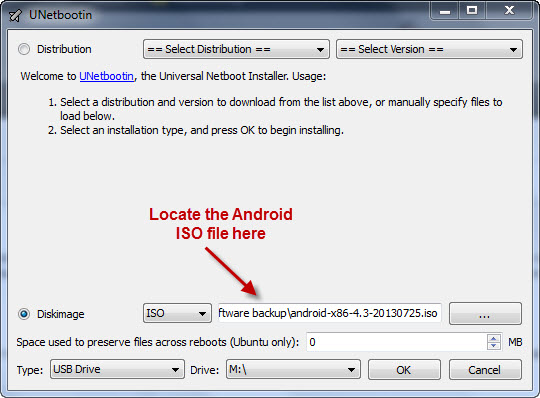
Step 4: For Mac and Windows users, just locate and mount the ISO file. Then select your USB drive and click “OK” to extract the file. Now your USB drive is bootable and ready for Android 4.3 installation.
Step 5: Insert USB drive in the PC you need to install and restart it. Now you have to the change the BIOS boot order. Go to Boot Menu in the BIOS settings and change the boot priority from “Hard Disk” to “Removable Disc”. Again restart your PC to start the installation. Once you restart the computer, it will automatically boot from your Removable Disc and take you to the installation page.
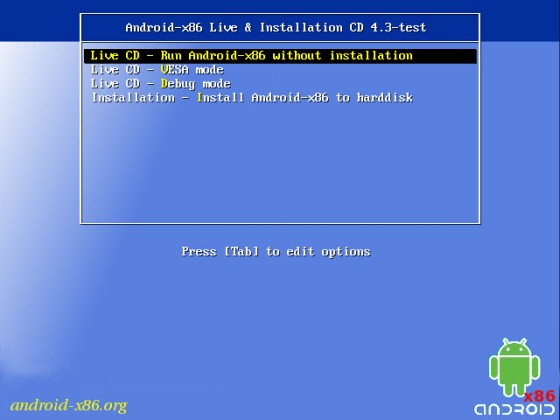
Step 6: If you have used Linux Live CD before to install any Operating System, then this Android installation page will look familiar to you. Just like other Linux Live CD installations, you can either start using the OS without installation or install it in your hard disk. For using it without installation, select the first option and start using the OS.
Only drawback in this method is, all your data will be deleted when you shutdown and leave the system. If you just want to make a try, you can use this option.
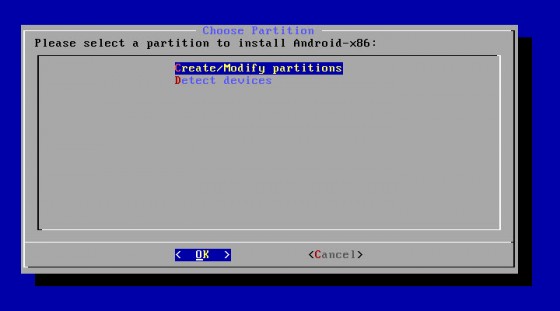
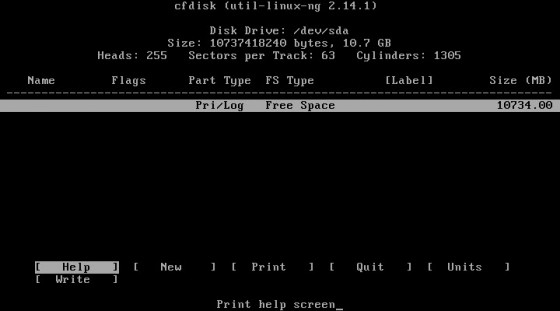
Step 7: So, to start installation in your hard disk, you have to choose the 4th option. As soon as you selected that, you will get a window as shown in the screenshot above, where you need to allocate RAM Memory and Hard Disk Storage. For this Android OS, 256 MB of RAM is enough. Use “New” on the bottom menu to allocate memory for RAM and Hard Disk. Here I’ve allocated 1 GB of RAM and 10 GB for hard disk storage.
Step 8: After allocating your memory for both, the installation will start automatically. The installation time will vary based on your hardware (CPU, RAM). Hardly it will take around 5 to 10 minutes. In the mean time you can sit back and enjoy a cup of coffee.
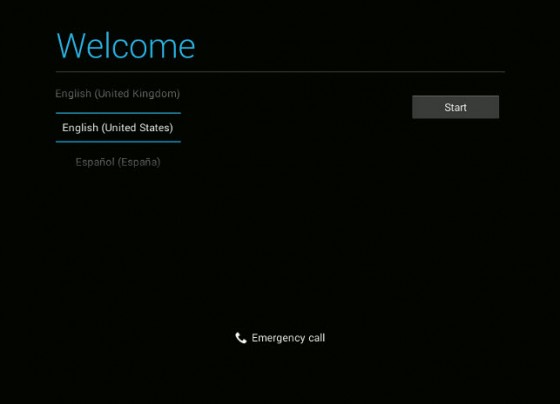
Step 9: Once installation is complete, you will get a welcome page as shown in the screenshot below. Choose your preferred language and click on “Start” button to configure the settings in First Boot.
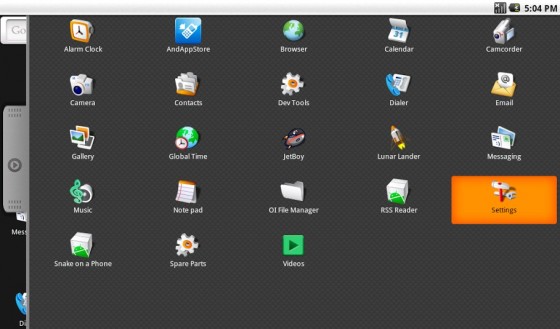
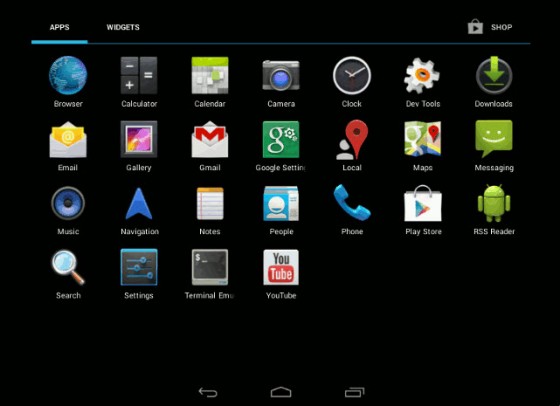
Step 10: Once you selected the language and clicked on Start button, it will take you to the Android home page. Then rest of the things are usual. You can go to the menu, configure your Play Store account, install apps, browser internet, etc.
That is all, now its time to enjoy your fresh and amazing looking Android OS on your PC. We believe this simple and easy to follow android tutorial helped you to configure the Google Android latest release on your Computer. Thanks for reading and you may now share this post with your friends and followers across social network sites. Have a wonderful and productive day !


how do you get the wifi or even the internet working via ethernet
how do you dual boot, Ubuntu mate and android-x86-6.0-r1