How to Fix “Set Automatically” is Greyed Out in Date and Time Settings on iPhone and iPad? Unable to set the exact time according to your time zone? Don’t worry. It’s not only you facing issues with the greyed-out problem.
Recently, most iPhone and iPad users complained about the issue; their iPhone or iPad is not adapting to the time zone, and the option to set time automatically has greyed out.

This article will help you fix the “set automatically” greyed-out problem in date and time settings on your iPhone or iPad if you are among them. If you have a problem with your iPhone or iPad Screen Recording feature, where it says “Screen Recording Not Available When AirPlay…” Error, then do try the suggested steps to fix it.
Before discussing the troubleshooting steps, ensure your iPhone or iPad shows the accurate time of your zone.
Table of Contents
Fix Set Automatically Greyed Out in Date and Time Settings
If it is not, then you have to set it manually. Suppose the date and time are not accurate on your device. In that case, it will cause various other issues, like pending updates, unable to open AppStore, or it causes problems on various other Apple services.
So make sure that your iPhone or iPad is showing the accurate time. Also, ensure your device is running the latest iOS or iPadOS version.
Also Read, How to Fix “This Device Cannot be Transferred Error on your iPhone?”
#1 Turn off Screen Time
If the Screen Time is turned on, your device will not be able to perform a few options that include “set automatically” greyed or dimmed on your iPhone or iPad so make sure you turn off the screen time on your device.
To turn off the screen time on your iPhone or iPad,
Step 1: Open the Settings app on your iPhone or iPad.
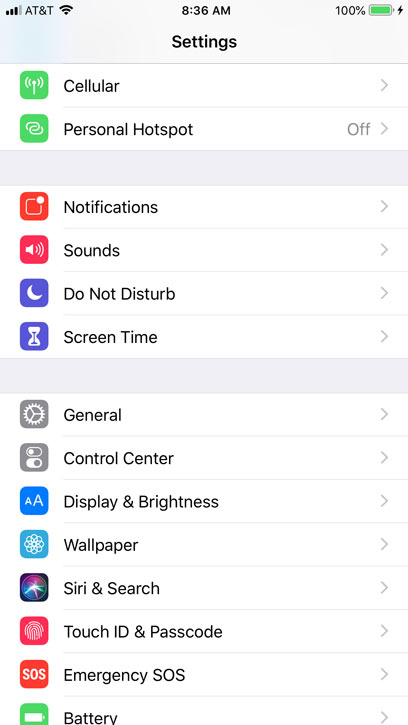
Step 2: Navigate to Screen Time.
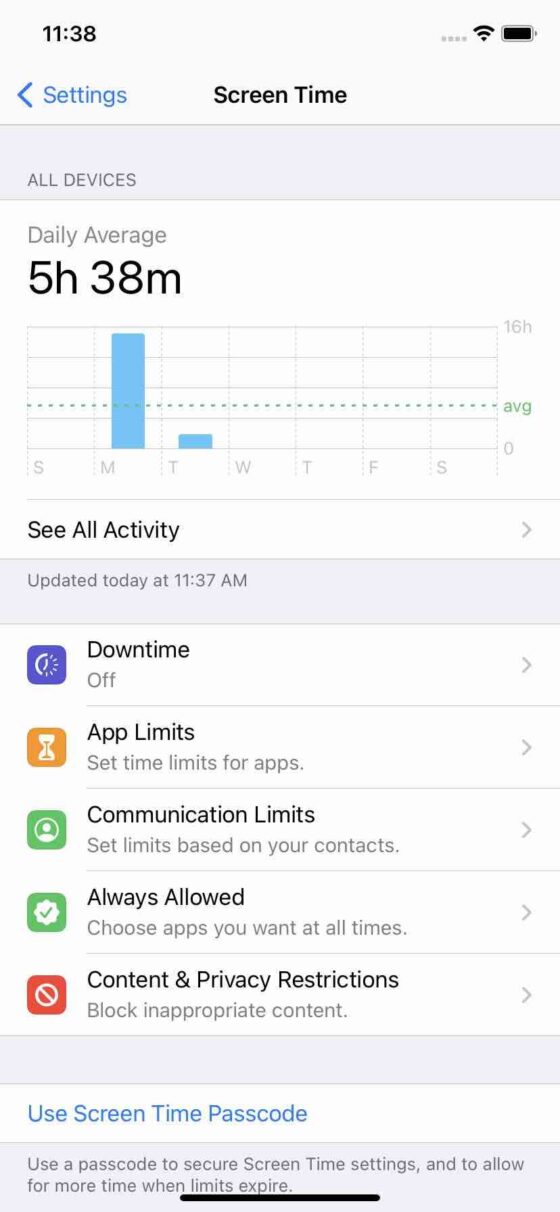
Step 3: Scroll down and tap Turn off Screen Time if you are not using it. or Navigate inside Content & Privacy Restrictions and turn it OFF.

After turning off your screen time, check whether the “set automatically” option in the date and time settings is working. If the option is working fine but still if the set automatically remains greyed out, then try the second troubleshooting step.
Also Read, Transfer WhatsApp Business Chats from Android to iPhone [100% Working]
#2 Update your Carrier Firmware
Ensure you are updating your carrier settings often; the carriers may often release updates to improve network and reception and check whether your device has pending carrier updates. To check carrier updates.
Step 1: Open the Settings app on your iPhone or iPad
Step 2: Navigate to General > About.

Step 3: Tap on Carrier. A pop-up will appear to update your carrier settings. Tap on update.

After updating your carrier, check whether the “set automatically” option in data and time settings is working. If the set still automatically remains greyed out, then try the third troubleshooting step.
#3 Enable Location Services
Make sure the setting time zone option can be found in the system services on your iPhone or iPad. Giving access to setting a time zone on your current location will automatically enable “set automatically” in date and time in the settings app on your iPhone or iPad.
To turn on Setting Time Zone,
Step 1: Open the Settings app > Privacy on your iPhone or iPad.
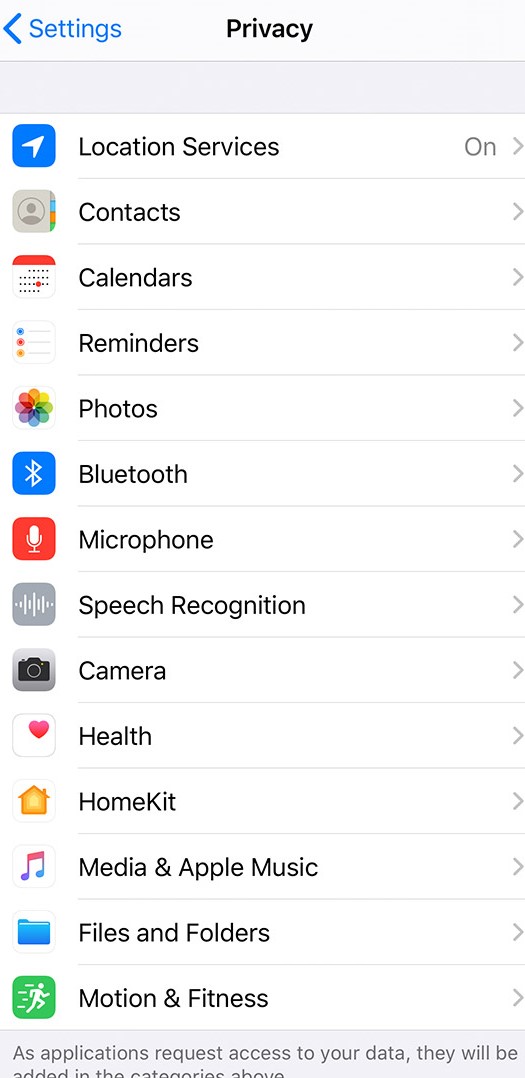
Step 2: Tap on Location Services
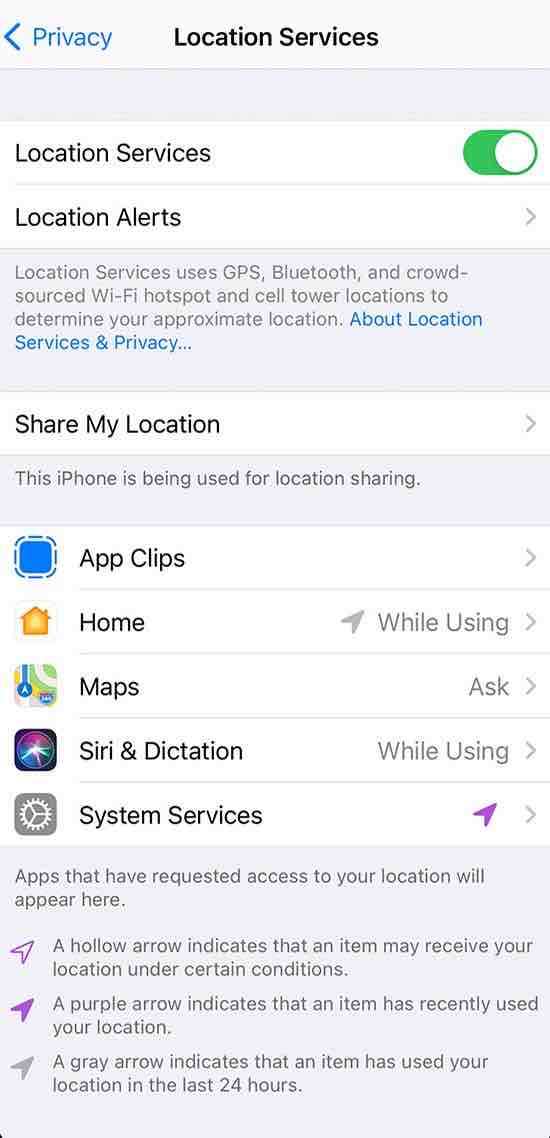
Step 3: Scroll down and Navigate to System Services

Make sure the Setting Time Zone option is turned on. If the option is turned off, toggle it on. After toggling on the Setting Time Zone, ensure the “set automatically” option in data and time settings is working.
If the set still automatically remains greyed out, then try the fourth troubleshooting step.
If the set automatically option remains greyed out or dimmed, then the final troubleshooting steps will be resetting all settings.
Lowkey unless performing the first three troubleshooting steps, and if still, the problem exists, then you have to try resetting all settings to turn the device into the default customization.
#4 Reset All Settings
Step 1: Navigate to Settings > General.
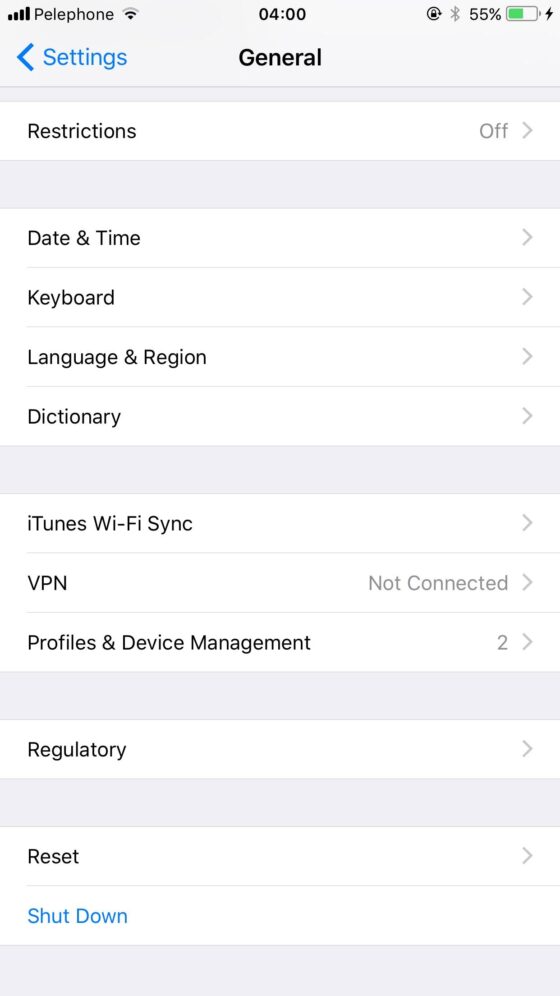
Step 2: Scroll down and Navigate to Transfer or Reset iPhone.

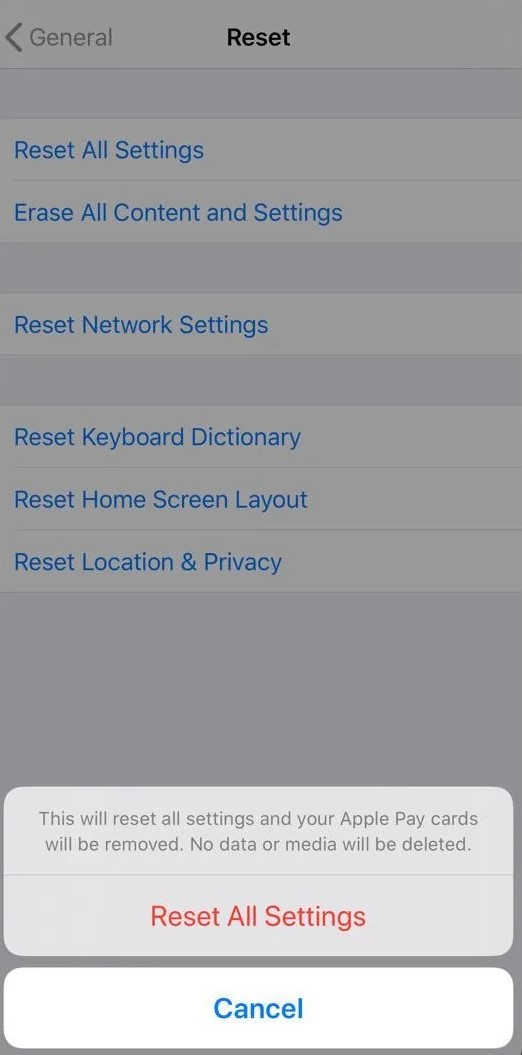
Step 3: Tap Reset All Settings and enter your Passcode and Screen Time Passcode, if you have enabled Screen Time. Else enter iPhone Passcode to proceed.

Step 4: Tap Reset All Settings and wait until your phone gets restart
Thanks for reading; I hope any of these troubleshooting steps have helped you to fix the issue, and if you find this post helpful, do share it with your friends on Twitter and Facebook. Someone who faces a similar issue can also fix the “set automatically” greyed-out problem in date and time settings on their iPhone or iPad.
Have a wonderful day.