Screen Recording for Mac requires No App. You can do it for Free with QuickTime Player. But what makes Screen Studio stand out and be special? Is it what it claims to be? The Best Screen Recorder for Mac? Are any Screen Studio Discounts or Coupons available?
I will swiftly answer all those common questions in this Screen Studio In-Depth Review.

If you do not like reading a few passages, you may check our Screen Studio Review Video here, which gives a complete walkthrough of its features and how to Record and Edit Recordings.
Buy/Download Screen Studio for Mac
Table of Contents
Screen Studio Review
There are a few popular Screen Recorder Apps available for Mac. But why does anyone have to Buy Screen Studio? What makes it stand out from the crowd, and any special features?
What makes Screen Studio Special?
Educators, Video Tutorial Creators, and people who want to create stunning presentations spend hours with their editing workflow.
Screen Studio eliminates that Editing process with its simple and easy Features.
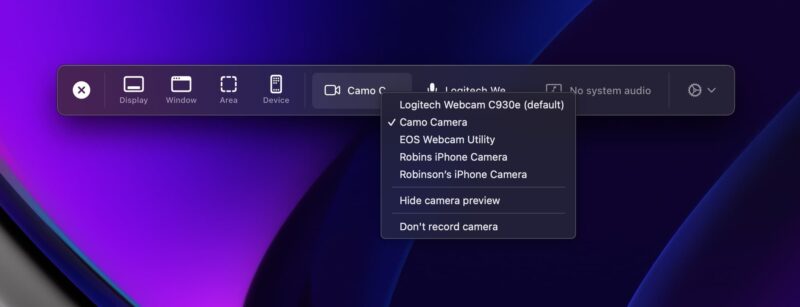
Fire up Screen Studio and Start Recording your Mac Screen by selecting Camera, Microphone, Specific Window, Apps Window, iPhone, or iPad connected to your Mac. Once done, click the Stop button, and your beautiful screen recording is ready.
I have been following the Screen Studio Twitter page and its Developers to track the progress since it was in the Beta stage. An impressive track record of fixing bugs and bringing features swiftly to the app.
Also Read, iPhone Frame Drop Problem while Gaming, How to Fix?
You will be presented with an Editor window, where you can choose which part of the window needs to be zoomed in or zoomed out if the auto-selected Zoom and focus data looks wrong. You can increase or decrease the length of the Zoom function and fine-tune your Screen Recording.
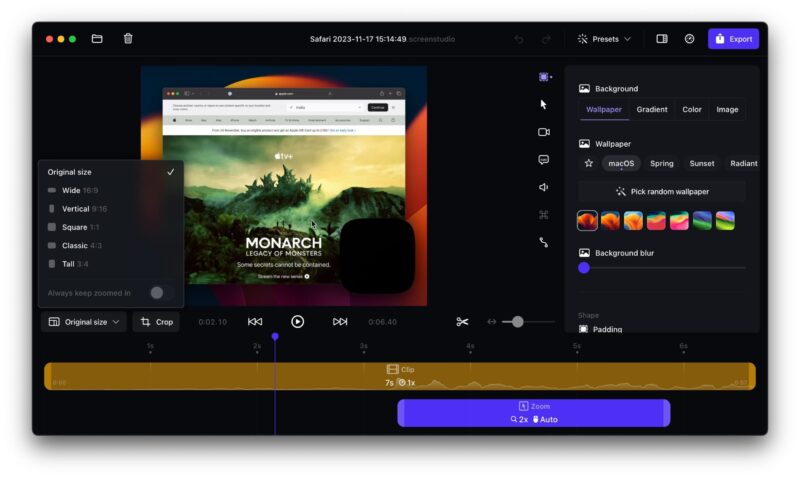
Additionally, you can split and remove any unwanted Screen Recordings within this Editor Window.
Look how minimal it is. I love the UI and Design of the Screen Studio Editor Window. Claps to the Developer .
Whether it’s YouTube video, Shorts, or Instagram Reels, You can select the Recording output window size before starting the Recording or during the Editing process by clicking on the bottom left corner Size menu icon.
Screen Studio Background and Screen
You will land on this primary page after completing your screen recording. Here, you can customize and change the Background Wallpaper or change it entirely to Gradient, Fill with colors, or any Image you want to be a Background of your Recording.
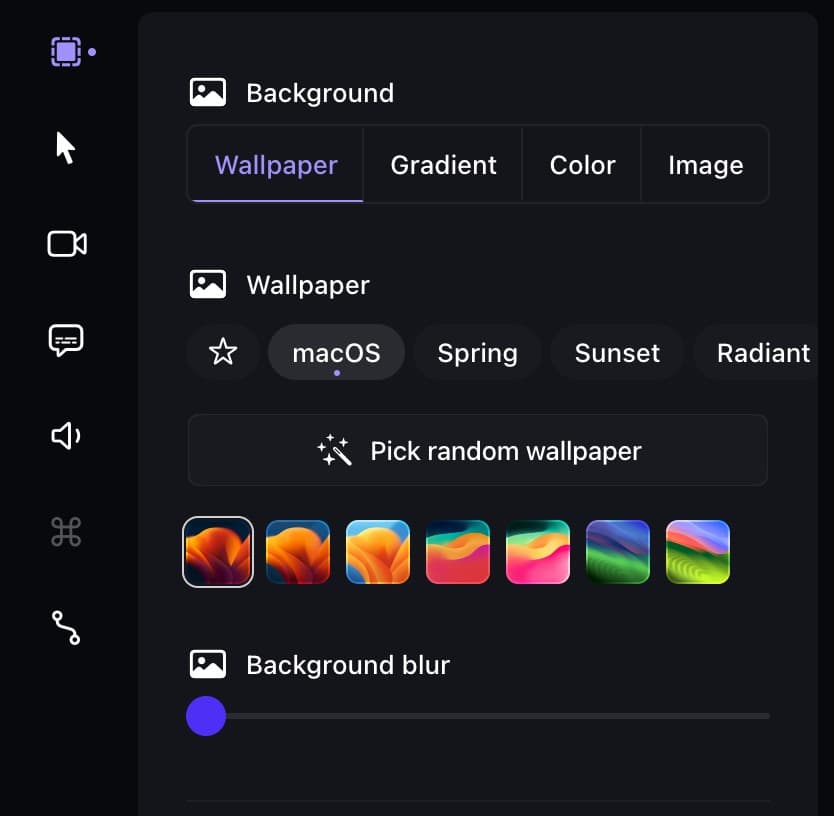
Scrolling down a little will show you the amount of Background Blur you want to add to your Recording.
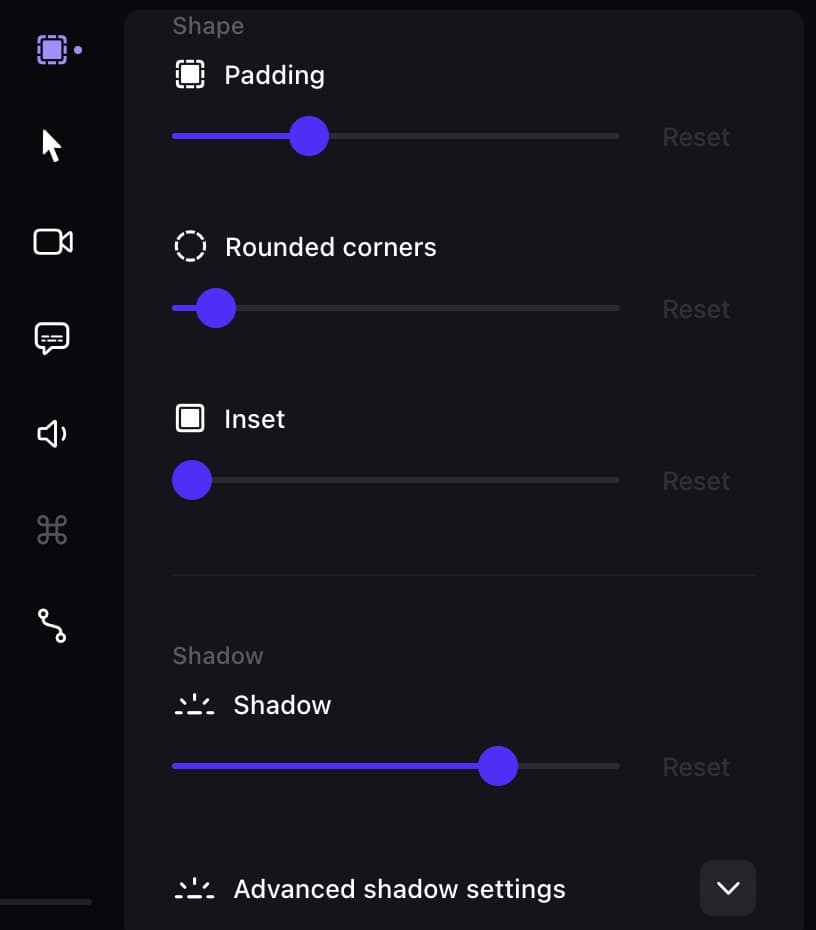
Shape and Padding you like to set for the Window to Resize and give clear focus to the main content you have recorded. Adjust the corners, whether it has to be Rounded or Square shape. Adjust the shadow level with its advanced settings.
You can save this setting as Preset and Quickly use it whenever you need to apply again for future projects.
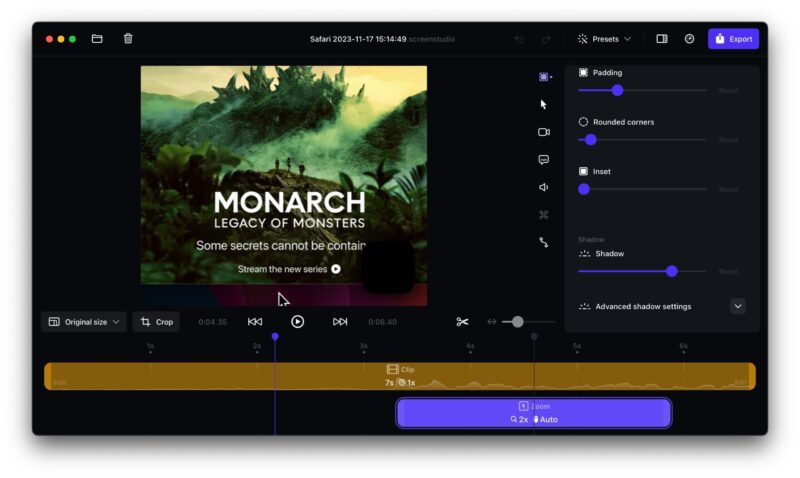
You can easily swipe through the Timeline using your Macbook Trackpad or Magic Mouse Swipe Gesture. Pause the Timeline (Yellow) where you want to split the clip; adjust the Zoom level (blue color) by easy click and drag editing style.
That is all. In a few minutes, your video will be ready.
But Wait, there are more Controls hidden in plain sight :). Let’s explore them one by one.
Cursor Style Selection
You will be given a few interesting options from the Right side menu system when you click on Cursor settings.
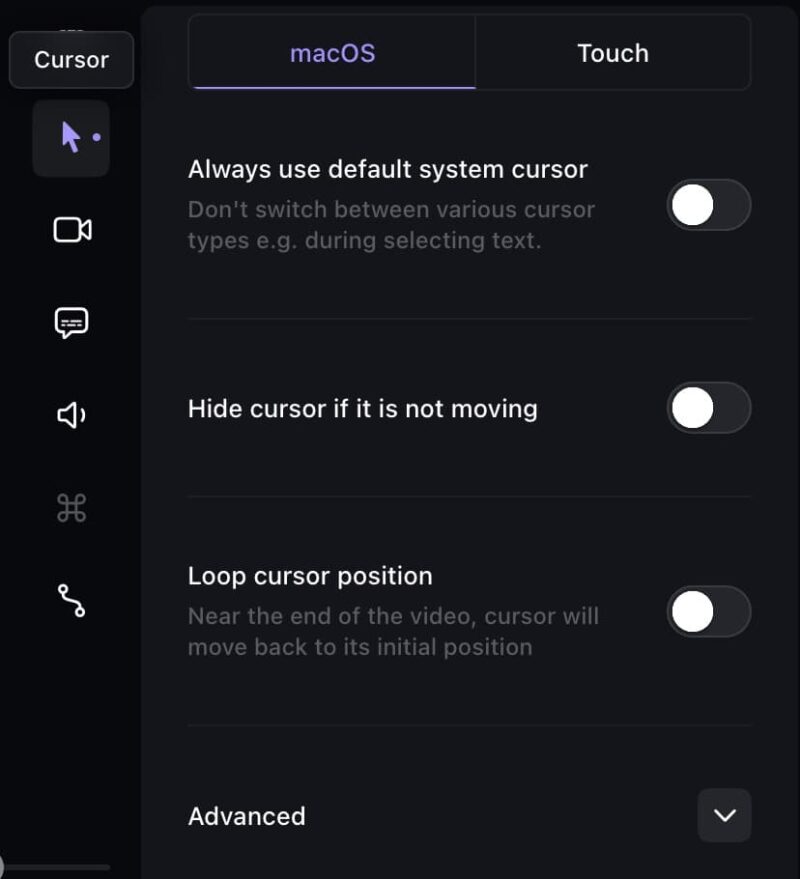
You can use the Default Cursor Style available in macOS, or the Touch style input method can be selected here. Adjust cursor size and hide cursor if you don’t want it to appear in your Screen Recording.
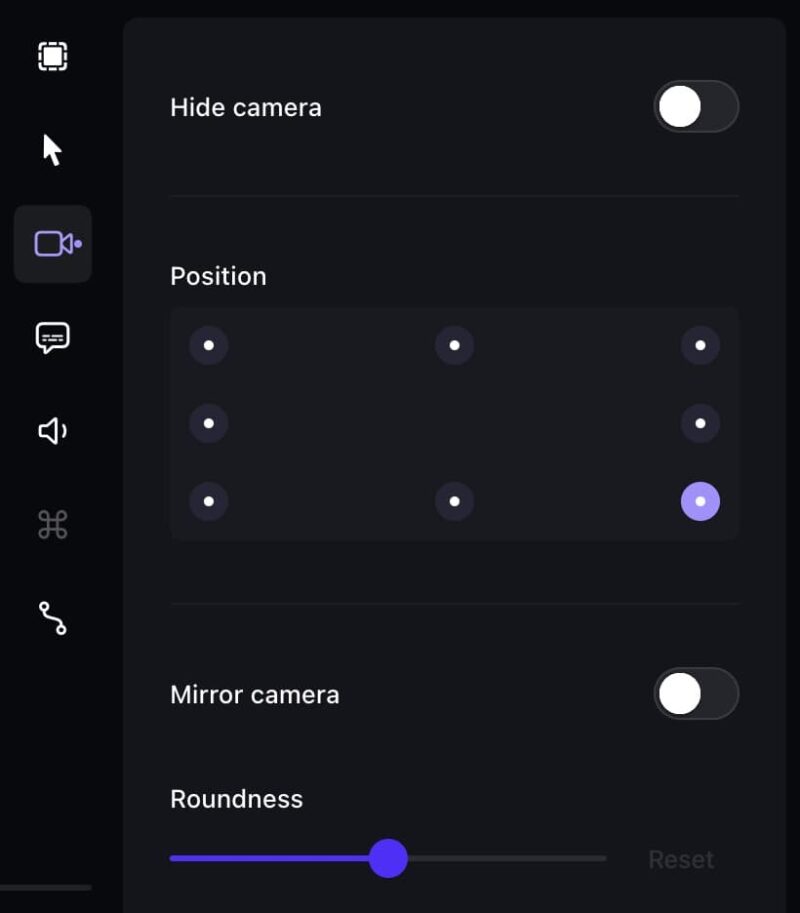
Decide where your Camera should appear on the Screen Recording on this page. Position it in any direction to avoid any interference with the main subject. By default, Screen Studio Resizes the Video Camera inside your recording based on your interaction with the main Window or Device Recording.
In this menu, you can Resize the camera as per your choice, Mirror camera selection, and during Zoom, how much size it should be can be set.
Screen Studio Caption or Subtitles Transcript
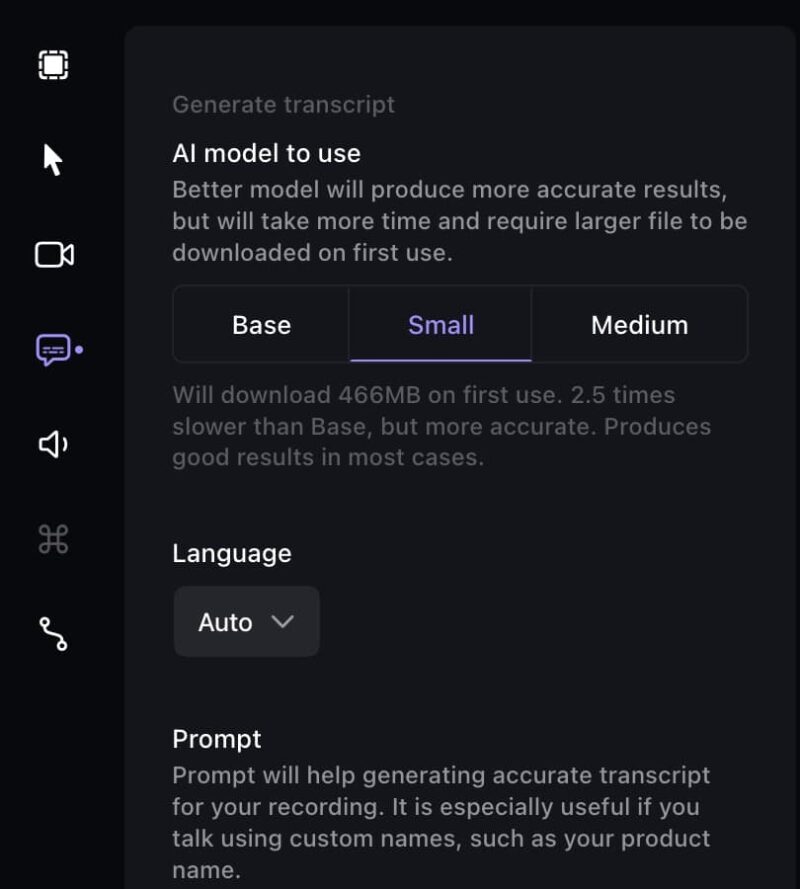
Screen Studio Transcript service lets you generate captions or subtitles for several languages. This built-in feature is time-saving, and do you remember those Instagram Reels and YouTube shorts with attractive Captioning? You can generate those right inside this Screen Studio Editing Window.
Under Language, you can choose which language this video voiceover is from and click on the Generate Transcript button.
Also Read, How to Connect a Mac to a TV Using HDMI cable?
The next option is to Mute Microphone, only if you want to, and add some background music to the video later while uploading it to social media platforms.
Of course, you can export this screen recording project to your local disk and import it to Final Cut Pro, Adobe Premiere, or any Video Editing App you normally use. I am a Final Cut Pro user, so I create screen recordings using Screen Studio and edit them using Final Cut Pro to add final touches before publishing them online.
Screen Studio Animation Settings
The main feature of Screen Studio is that it is kept as the last option in the menu system. Screen Studio uses Newtonian laws of motion to calculate animations. You see such a beautiful animation effect with your Screen Recordings.
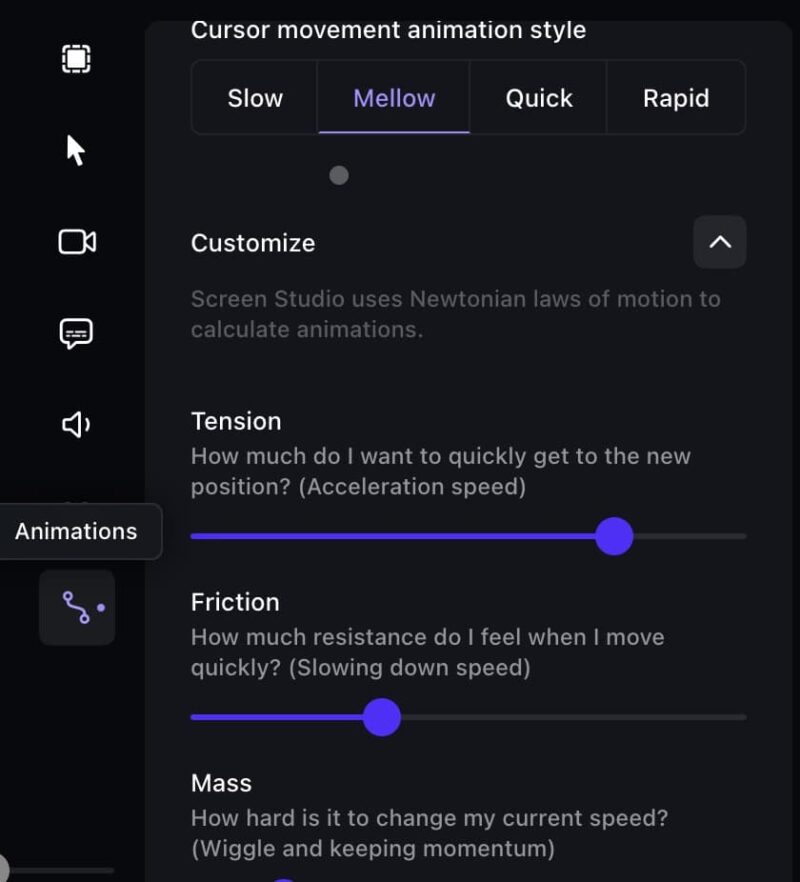
You can control your Screen Recordings Motion Blur settings, Curor movement settings, and Zoom settings. Control the Tension, Friction, and Mass of the animation effect in the video while it zooms in and out with your particular click-and-touch actions.
Presets like Slow, Mellow, Quick, and Rapid also help you to choose from the default selection according to your needs.
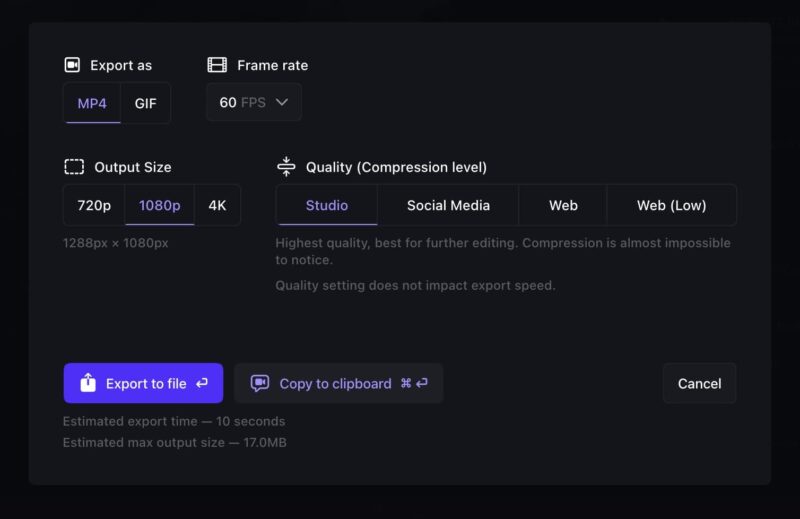
We are in the Final Screen and Ready to Export our Project. Choose whether you want the output file to be .MP4 or .GIF format. Frame Rate can be selected between 10 fps to 60 fps from the drop-down menu.
Select the Resolution between 720p, 1080p or 4K. Then, Quality settings, such as Studio, Social Media, Web, or Web (Low), are quality settings according to the compression level. Studio has the highest quality output, and the file size will be bigger, too.
Click “Export to File” and select the Destination Folder to Save your Beautiful Screen Recording Video File.
One last thing…
Above all, Screen Studio Developer is constantly working hard to develop, add new features, and fine-tune Screen Studio better every day. I have been following the development since it was in the Beta stage.
It is an Impressive product that solves problems that many Video Tutorial Creators have.
✅ Go for it.
Screen Studio Pricing
It has a simple pricing structure for common users. If you plan to Buy a Screen Studio license key for your Mac, the standard license costs $89. That is valid for 1 Mac computer. You will Pay once and use it forever.
Extended Screen Studio License Key costs $189 and is suitable for 3 Mac computers. If you have an iMac or Mac studio at the office and want to use Screen Studio on your Macbook Air or Pro on the Go, then an Extended License will suit you.
They offer an Enterprise License; you must contact them for a Teams License to use with more than 3 Mac computers.
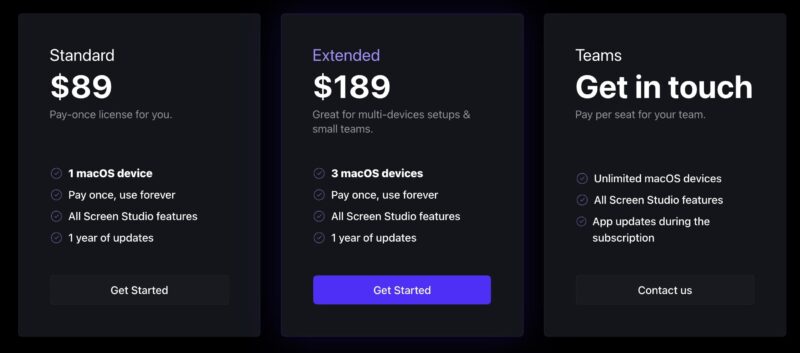
Both licenses are Pay Once, Use Forever. This means you don’t have to renew subscription fees every year. If you want future updates and New Screen Studio features, you may find it interesting, then you may Renew the Screen Studio License.
Currently, there is no information about Renewal Price details. I will update them here as soon as it’s available.
Buy/Download Screen Studio for Mac
Screen Studio Discount Coupons?
At the moment, there are no active Screen Studio discount codes or promo deals available. If anything pops up during the Black Friday sale or other upcoming offers, I’ll be sure to share the update on our social media.
So if you’re not already following, check out our Dailytut X page and YouTube channel to stay in the loop.

