Trying to connect your iPhone or iPad to a Wifi network, but getting an error message saying,”No Internet Connection?” We can Fix iPhone Won’t Connect to Wifi Network Error in a few easy steps. The same applies to iPad with similar errors.
Recently, many iPhone and iPad users started to see this error message “iPhone Won’t connect to WiFi Network.”
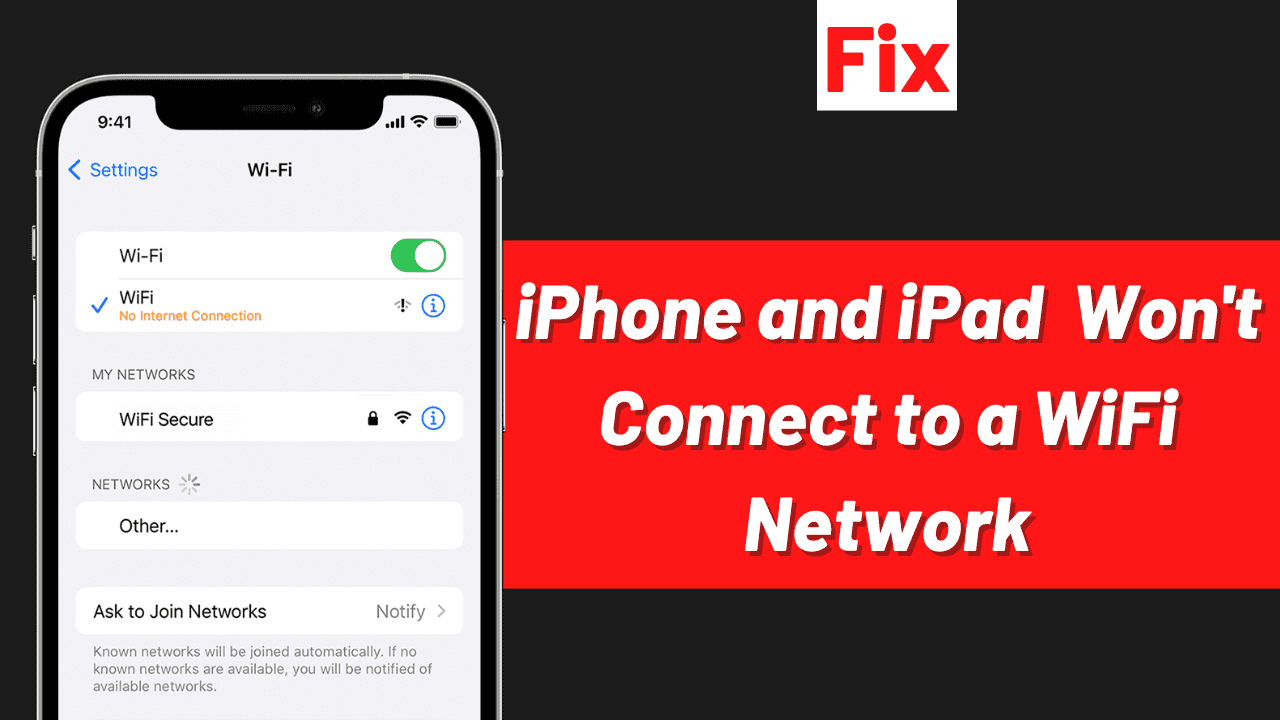
“No Internet Connection” error message on your iPhone or iPad, can be fixed with the following 4 simple troubleshooting methods.
Also Read, How to Use Free Microsoft Office on iPhone and iPad?
Table of Contents
Fix iPhone or iPad Won’t Connect to WiFi Problem
It is difficult to pinpoint one issue that affects your iPhone or iPad in connecting to a Wifi network. It could be due to a software bug, issues with the connectivity, or the DNS network. Several factors restrict your device from connecting to a Wifi network.
But in most cases, it is not a software update issue. I can assure you that because a few of my colleagues who have not updated their iPhones are also facing the same issue, so don’t conclude unless you have tried all the basic troubleshooting steps.
Turn off WiFi
The first troubleshooting step to follow when you face the “No Internet Connection” error message on your iPhone or iPad is to turn off the wifi, Restart your iPhone once, then turn it back ON and check the problem is fixed or not.

In most cases, the problem will get resolved by performing this basic troubleshooting step.
Also Read, Unable to CHECK for Update or INSTALL Update Error on iPhone, How to Fix?
Set DNS to Manual
If the problem is not resolved with the first troubleshooting step, then kindly try this one. Setting up a manual DNS server will recover you from this problem.
Step 1: Open the Settings app, Tap Wifi
Step 2: Tap on the info (i) icon of the Wifi network

Step 3: Navigate to Configure DNS

Step 4: Tap Manual
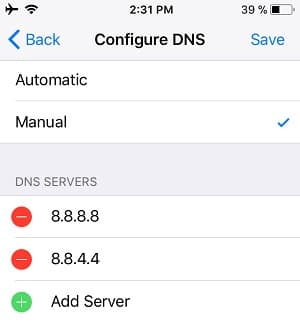
Step 5: Tap Add Server
Enter Google DNS (8.8.8.8, 8.8.4.4) in the Primary and Secondary DNS Servers. If you want to use Cloudflare DNS Service, use (1.1.1.1, 1.0.0.1) to complete the DNS Configuration.
Also Read, iPhone Privacy Warning WiFi Fix, What does it mean?
Step 6: Tap Save.
Adding a faster DNS server, will help you with an overall faster network experience, and increase the website’s efficiency on your device.
Enable Auto Join
Enabling Auto-Join on your iPhone or iPad will automatically let your device connect to a preferred and faster Wifi network if it already has the credentials to connect.
Step 1: Open Wifi settings on your iPhone

Step 2: Tap on the info (i) option of the Wifi network
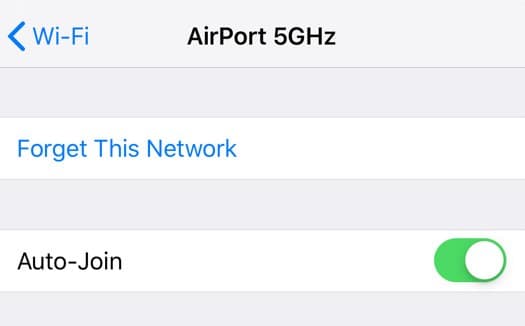
Step 3: Toggle the Auto-Join switch
Try connecting your iPhone or iPad to a Wifi network and check whether it is connected successfully or not.
Also Read, How to Fix “An update is required to use cellular data on this iPhone.”?
Reset Network Settings
Try resetting your network settings to fix your iPhone or iPad’s “Unable to Connect” error message. Resetting your network will not erase your device’s network. It will just erase configured settings like WiFi passwords, preferred networks, and Bluetooth connections.
To rest network on your iPhone,
Step 1: Go to the settings app on your iPhone
Step 2: Navigate to the General

Step 3: Scroll Down to Reset
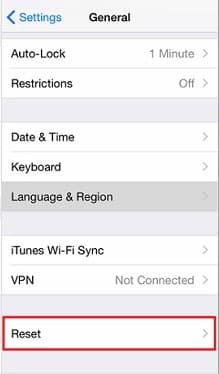
Step 4: Tap Reset network settings

After resetting your network, try connecting to Wi-Fi and check whether it is connected. I hope now your iPhone will be connected to a Wifi network successfully.
Try all these troubleshooting steps and check whether the problem got fixed; I hope this article helped you fix the “iPhone Won’t Connect to WiFi” Error on your iPhone or iPad. If you find this post useful, share it with your friends on Twitter and Facebook. Have a wonderful day.

